


How to Store Heirloom Seeds Long Term
07:00 AMLast Updated: November 1, 2026
Quick Summary
To store heirloom seeds long term, dry them fully, seal them in airtight containers, and keep them cool, dark, and dry. Aim for 32-41°F with relative humidity below 30%, and test germination before planting season.
- Dry seed on a screen for one to two weeks before sealing it up.
- Use glass mason jars, heat-sealed foil or Mylar bags, or gasket-sealed plastic containers.
- Keep storage between 32-41°F and relative humidity below 30%, ideally 20-25%.
- Seed moisture content of 5-8% suits most vegetable seeds; above 10% invites mold.
- Test germination yearly, and refresh any variety that sprouts below 50%.
Table of Contents
- Start With Seeds That Are Dry, Clean, and Mature
- Choose the Right Seed Storage Containers
- Set the Right Seed Storage Temperature and Humidity
- How Long Do Seeds Last in Storage?
- Test Seed Viability Before You Rely on Your Stash
- Label, Log, and Rotate Your Seed Inventory
- Start Your Seed Bank Now With ARK Seed Kits
- Frequently Asked Questions
Storing heirloom seeds long term is the difference between a seed bank that still sprouts in five years and one that quietly dies in a drawer. Most seeds lose vigor because of three things: heat, moisture, and light. Get those three under control, and your stash can stay viable for years. This guide from ARK Seed Kits walks through how to store heirloom seeds long term the right way, step by step.
Start With Seeds That Are Dry, Clean, and Mature
Good storage starts before the seeds ever touch a container. Seeds harvested too early or left wet will mold or rot in storage, no matter how careful you are later.
Wait until seed heads or pods are fully dry on the plant. Then thresh, winnow, and clean the seed of chaff and debris (seeds project).
Watch out: Storing seed that still has any moisture is the most common reason a batch fails. Dry it on a screen for one to two weeks in a warm, airy room before sealing it up.
Choose the Right Seed Storage Containers
The container you pick matters almost as much as the storage spot. Seeds need protection from air, humidity, and light.
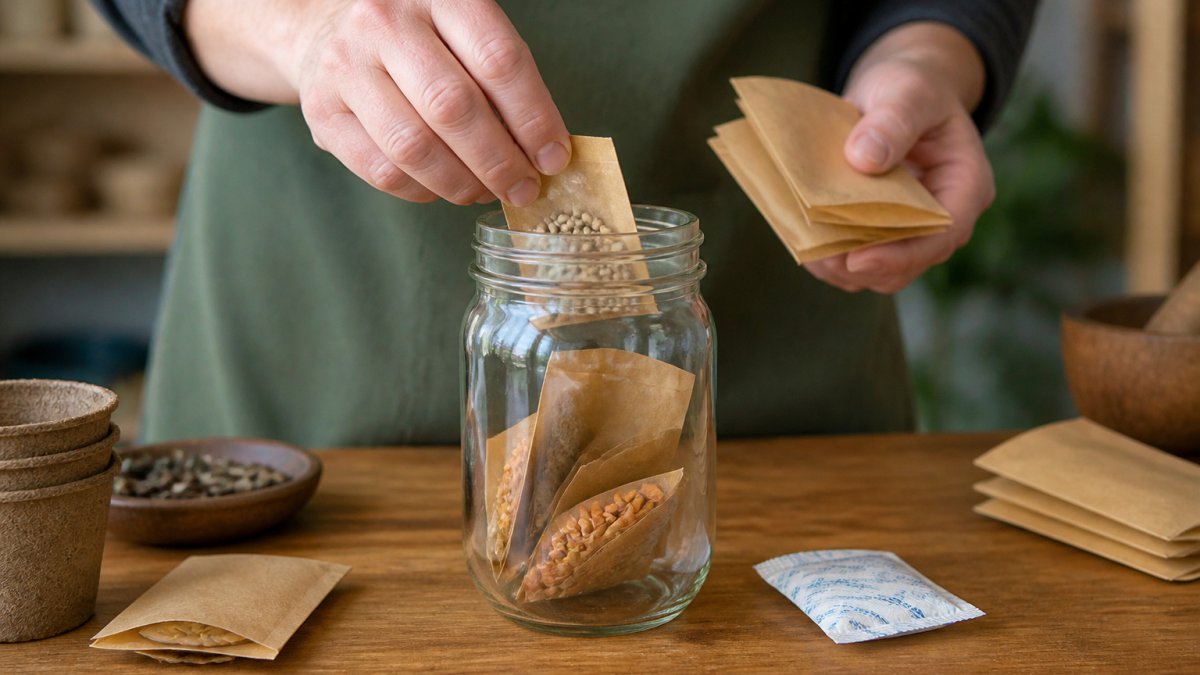
Use these options:
- Glass mason jars with tight lids. They block light and seal well.
- Foil or Mylar bags heat-sealed shut. Great for long-term bulk storage.
- Airtight plastic containers with gasket seals. Useful for everyday access.
Avoid paper envelopes alone. They let moisture in and offer no real protection. Label every container with the variety name and harvest year before you close it.
Set the Right Seed Storage Temperature and Humidity
Cool and dry is the goal, but "cool and dry" is not a specification. Long-term seed storage works best when you can name a target and measure against it.
The numbers that matter
Most seed-saving practitioners aim for these conditions:
- Temperature: 32-41°F (0-5°C) for long-term storage. A steady refrigerator or chest freezer in this range is ideal. Room temperature (around 70°F) is fine for a season or two but shortens viability over years.
- Relative humidity inside the container: below 30%, and ideally around 20-25%. Above 40%, fungal growth and rapid aging become likely.
- Seed moisture content: 5-8% for most vegetable seeds. Below 5% can damage some seeds; above 10% invites mold.
The old rule of thumb, every 1% drop in seed moisture roughly doubles storage life, and every 10°F of cooling extends it further, is a useful mental model, but it only works if you actually control moisture and temperature rather than hoping the pantry is dry enough.
Why humidity, not just temperature, drives seed death
Seeds are hygroscopic: they absorb and release moisture until they reach equilibrium with the air around them. That means the humidity inside your container matters more than the humidity in the room, because a sealed jar with damp seed will stay damp. Two mechanisms are at work:
- Metabolic aging: at higher moisture and temperature, seeds burn through stored energy faster and accumulate damage.
- Fungal and insect pressure: above roughly 60% relative humidity, mold and storage pests become active.
This is why the container and the desiccant matter as much as the thermometer. A jar of dry seed with a fresh silica packet holds a low internal humidity even if the room swings.
Climate-specific adjustments
Storage requirements shift with regional humidity, and most guides skip this:
- Humid climates (Southeast, Gulf Coast, Pacific Northwest): prioritize airtight containers and desiccants, and consider a dedicated dehumidified room or a sealed tote with a rechargeable desiccant canister. Open-air drying before sealing is essential, seed left on a screen in 80% humidity will not dry below 10%.
- Arid climates (Southwest, Mountain West): drying is easy, but temperature swings and summer heat are the bigger threat. Store in an interior closet or basement away from exterior walls, and use a freezer if summer temperatures regularly exceed 80°F indoors.
- Four-season climates with basements: a cool basement (55-65°F) is workable for medium-term storage; a refrigerator is better for anything you plan to keep more than three years.
Freezer vs. refrigerator storage
A standard refrigerator works for short-term storage of a few seasons. A chest freezer held at a steady temperature is better for long-term stashes. Avoid frost-free freezers, since their automatic defrost cycles create temperature swings and dry out containers.
Whatever you use, seal seeds fully before they go in. Condensation forms when cold containers warm up, so let sealed jars come to room temperature before opening them, otherwise moisture condenses directly onto the seed.
Controlling moisture with desiccants
Silica gel packets help keep containers dry. Add a packet to each jar or bag, then seal it. Replace or recondition the packets if they change color or feel damp.
- Use food-safe silica gel, kept separate from the seeds
- Check packets each season for saturation
- Recharge indicator silica in a warm oven according to the package directions
- Store the sealed containers in a dark spot
The article gives these target conditions for keeping seed viable over the long term.
| Factor | Target | Note |
|---|---|---|
| Storage temperature | 32-41°F (0-5°C) | Best for long-term storage |
| Room temperature | Around 70°F | Fine for a season or two only |
| Relative humidity | Below 30%, ideally 20-25% | Above 40% raises fungal and aging risk |
| Seed moisture content | 5-8% | Below 5% can harm seed; above 10% invites mold |
| Humidity threshold for pests | Above roughly 60% | Mold and storage pests become active |
How Long Do Seeds Last in Storage?
Seed life varies by species. Onions and parsnips often fade within a year or two, while many squash, beans, and tomato seeds keep viable for several years when stored well. Cool, dry, dark conditions extend those windows.
Still, plan to refresh older stock as germination rates drop over time.
Test Seed Viability Before You Rely on Your Stash
Most storage guides stop at "keep it dry and cool." Testing whether the seed still works before planting season is a useful step to protect your food supply. Germination rate tells you what fraction of a batch will sprout, which determines how many seeds to sow per spot and whether to refresh the batch.
The paper-towel test, done properly
- Count out a known number of seeds, 10 is a practical sample, 20 gives a tighter estimate.
- Place them on a damp (not soaking) paper towel or coffee filter. Space them apart so roots don't tangle.
- Fold or roll the towel, slip it into a sealed plastic bag, and keep it warm, most vegetable seeds germinate best around 70-75°F.
- Check daily after the crop's normal germination window. Typical windows: radish and lettuce 3-7 days; tomatoes and peppers 7-14 days; carrots and parsley 14-21 days.
- Count sprouts with a visible root or shoot and divide by the number you started with.
A batch at 80% or better is strong. 50-79% is usable, sow thicker. Below 50%, plan to refresh the variety or sow heavily and expect gaps.
Alternative tests for larger collections
- Rag-doll test: same idea as the paper towel, but seeds are rolled in a damp cloth and kept upright in a jar; easier to check without disturbing roots.
- Baggy test: seeds on damp paper towel inside a zip-top bag, the standard home method and the easiest to label and date.
- Tetrazolium (TZ) test: a chemical stain that shows living tissue without waiting for germination. Used by seed labs; not practical for most home gardeners, but worth knowing if you buy from a supplier that publishes TZ results.
- Float test: a quick, rough screen, seeds that float in water are often (not always) nonviable. Useful as a pre-filter, not a verdict.
What to do with the results
Testing is only useful if it changes a decision:
- Update your inventory log with the test date and germination percentage for each variety.
- Adjust sowing density: at 60% germination, sow roughly 1.5-2× the normal rate.
- Prioritize refresh: varieties below 50% go to the top of the replant list; use remaining seed this season rather than saving it another year.
- Re-test annually for anything older than three years, and after any storage disruption (power outage, moved containers, opened jars).
When to test
Test 4-6 weeks before your planting window so you have time to buy or trade replacement seed. For fall plantings, test in late summer. For spring, test in late winter while you are still planning the garden.
If fewer than half sprout, sow extra seed or refresh the batch. This quick test prevents surprises in the garden.
Label, Log, and Rotate Your Seed Inventory
A seed bank is only useful if you can find what you need. Label every container with variety, harvest year, and storage date. Keep a simple log in a notebook or spreadsheet.
Rotate stock so older seeds get used first. Move the oldest packets to the front of the storage spot, and plant them out each season to keep the stash fresh.
Start Your Seed Bank Now With ARK Seed Kits
If you are building a long-term stash from scratch, start with seed that is already packed for storage. ARK Seed Kits offers heirloom seed kits, and the Seed Growing Guide covers planting, growing, and seed saving for every variety in the kit, along with a zone planting map and seasonal planting chart. The guide is included free in the All-in-One kit.

For more on saving and handling seed, see our beginner guide to saving heirloom seeds and our overview of the benefits of saving your own seeds.
Storing heirloom seeds long term comes down to dry seed, airtight containers, cool dark storage, and regular testing. Get those right, and your seed bank will be ready when you need it. For more guidance,
Frequently Asked Questions
How long do packaged seeds stay viable?
Shelf life varies by species. Many common vegetable seeds stay viable for two to five years when stored cool, dry, and dark, while some species such as onions and parsnips tend to lose vigor faster. Seeds stored in airtight containers with low moisture often remain usable beyond their printed date, but germination drops gradually over time. Run a simple germination test before planting older stock so you can adjust seeding density to match the results.
Will 4-year-old seeds still grow?
Often, yes, but expect a lower germination rate than with fresh seed. Four-year-old seed stored in a sealed jar, kept cool and dry, can still sprout well for many crops. To find out, place 10 seeds on a damp paper towel, keep it warm and out of direct light, and count how many sprout after one to two weeks. If fewer than half germinate, sow more thickly or buy fresh seed for crops where every plant matters.
Should seeds be stored in the refrigerator or freezer?
A freezer gives the longest storage life, provided the seeds are fully dry before they go in. A standard refrigerator works for medium-term storage, but it cycles temperature and humidity each time the door opens, which can shorten viability. Whichever you choose, seal seeds in airtight containers with desiccant first so condensation does not form when you take them out. Let sealed containers reach room temperature before opening them.
What containers are best for long-term seed storage?
Glass mason jars with tight lids, or foil or Mylar bags, work well for long-term storage. Label every container with the variety name, harvest year, and date stored. Add a food-safe silica gel packet or other desiccant to keep relative humidity low, and store containers in a dark, stable location away from light and temperature swings.


