


Beginner Guide to Saving Heirloom Seeds
08:00 AMTable of Contents
- Why Save Heirloom Seeds: Foundation for Self-Reliance
- Choosing Healthy, Vigorous Plants for Seed Saving
- Easiest Seeds to Save for Beginners
- Harvesting Fully Mature Seeds: Timing and Technique
- How to Dry Seeds for Storage
- How to Store Seeds Long Term
- Seed Viability Testing and Troubleshooting Failures
- Frequently Asked Questions
Last Updated: October 15, 2026
Why Save Heirloom Seeds: Foundation for Self-Reliance
Saving heirloom seeds is one of the most practical steps you can take toward food independence. When you harvest and preserve seeds from your best plants, you're not just growing next year's garden, you're building a system that frees you from relying on commercial seed suppliers.
Heirloom varieties are uniquely suited to this practice because they breed true. Unlike hybrids, which produce unpredictable offspring, heirloom seeds grow into plants nearly identical to their parents. This consistency means your saved seeds will perform the same way year after year.
The stakes matter more now. A small collection of properly stored seeds can sustain a family garden for years, or serve as emergency food security if circumstances demand it.

Choosing Healthy, Vigorous Plants for Seed Saving
The quality of your saved seeds depends entirely on the plants you select. This is where most beginners make their first critical mistake: they harvest from average plants and wonder why next year's crop underperforms.
Start by identifying your strongest performers early in the season. Look for plants that germinate quickly, grow vigorously, resist pests without intervention, and produce abundantly. These traits are heritable.
Disease-free selection is non-negotiable. Any plant showing signs of fungal infection, viral spotting, or bacterial damage should be excluded from seed saving entirely. Diseases can hide in seeds and emerge in next year's crop. One diseased plant can compromise an entire season's harvest.
Open-Pollinated vs. Hybrid Seeds
Open-pollinated varieties are the only seeds worth saving. These plants reproduce through natural pollination, wind, insects, or self-pollination, and their offspring reliably match the parent plant. When you save seeds from an open-pollinated tomato, the tomato you grow next year will taste and perform like the original.
Hybrid seeds are a dead end for seed saving. Hybrids are deliberately cross-bred from two specific parent lines to produce superior first-generation plants. The moment you save seeds from a hybrid, you've broken that formula.
Heirloom varieties are almost always open-pollinated, which is one reason they've survived for generations. They were preserved by farmers and gardeners who saved seeds season after season.
Disease-Free and High-Yielding Selection
Examine candidate plants closely before flowering. Look for dark green foliage without spots, lesions, or discoloration. Check undersides of leaves for unusual webbing or insect damage. A healthy plant has no excuses, disease pressure is universal, so plants that resist it naturally are genetically superior.
High-yielding plants are equally important. A tomato plant that produces 30 fruit is worth more to your seed stock than one that produces five, even if both are disease-free. Yield is heritable. By selecting productive plants, you're strengthening that trait in your saved seeds.
Easiest Seeds to Save for Beginners
Some crops are forgiving. Others demand precision. Starting with the easiest varieties builds confidence and prevents frustration.
Beans and peas are ideal first projects. They produce dry seeds naturally in their pods. Simply leave mature pods on the plant until they're completely brown and papery, then shell them indoors.
Squash and pumpkins are nearly foolproof. Their seeds are already enclosed in a protective fruit. Scoop them out, rinse off the pulp, dry them completely, and store them.
Lettuce, spinach, and arugula produce seed heads that dry naturally on the plant.
Herbs like basil, dill, cilantro, and parsley are similarly straightforward. Allow the plants to flower and set seed.
Harvesting Fully Mature Seeds: Timing and Technique
The biggest mistake beginners make is harvesting too early. Seeds must be fully mature, biologically complete and ready to germinate, before you pick them.
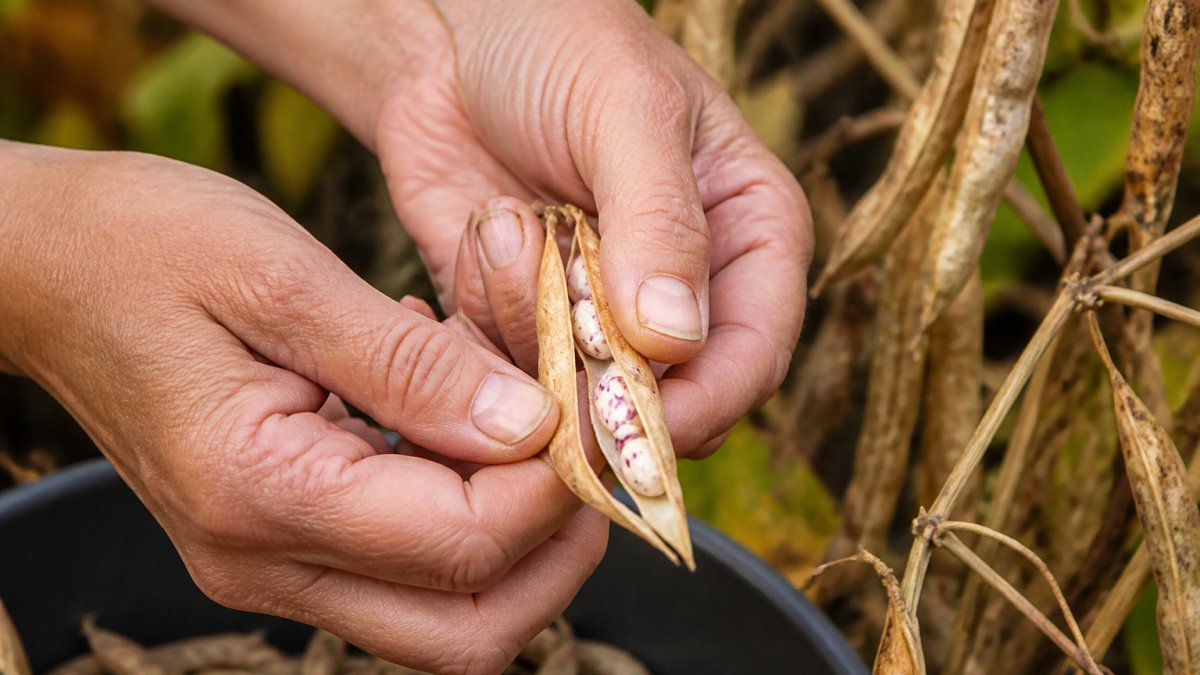
For dry-seed crops like beans and grains, maturity is obvious: the pod or seed head turns completely brown and papery. The seeds inside are hard and cannot be dented with a fingernail.
For wet-seed crops like tomatoes and peppers, maturity is trickier. The fruit itself must be fully ripe, the color you'd normally eat it at. Inside that ripe fruit, the seeds are surrounded by gel.
Timing matters seasonally. In most regions, you'll harvest seeds in late summer or early fall as plants naturally decline. Don't rush this.
Dry-Seed Crops vs. Wet-Seed Processing
Dry-seed crops are straightforward. Beans, peas, squash, pumpkins, herbs, and grains all mature with seeds in a dry state. Harvest when the pod or seed head is completely brown. Thresh the seeds out by hand or in a bag.
Wet-seed crops like tomatoes, peppers, eggplants, and melons require fermentation or washing to remove the gel surrounding the seed. Scoop seeds and gel into a small container with a bit of water. Cover loosely with a cloth, you want air circulation but not contamination. Let it sit for 2-5 days. The gel will break down as beneficial mold and bacteria do the work.
Preventing Cross-Pollination and Maintaining Varietal Purity
Cross-pollination is the hidden threat to seed saving. If you're growing multiple varieties of the same crop, two tomato varieties, three pepper types, or multiple squash plants, they can cross-pollinate and produce hybrid offspring that don't breed true.
Isolation distance is your primary defense. Different crops have different pollen-travel distances. Beans and tomatoes are largely self-pollinating, so cross-pollination is rare unless you're growing many plants very close together.
The practical solution: grow only one variety per crop per season, or separate varieties by distance. If space is limited, stagger plantings so varieties flower at different times.
Keep detailed notes on what you're growing and where. A simple garden map with variety names prevents accidental cross-pollination and confusion at harvest time.
How to Dry Seeds for Storage
Proper drying is critical. Seeds contain moisture, and that moisture invites mold and premature germination during storage.
Spread seeds in a single layer on a clean plate, screen, or paper towel in a warm, dry location with good air circulation. A windowsill works well, as does an attic or garage.
Test for dryness by attempting to bend a seed. Fully dried seeds snap or shatter when bent; seeds that flex still contain too much moisture. Once seeds pass the snap test, they're ready to store.
Humidity matters. In naturally humid climates, drying takes longer and may be incomplete.
How to Store Seeds Long Term
Storage conditions determine how long your seeds remain viable. Temperature and humidity are the two critical factors.
Moisture Content and Environmental Conditions
Seeds store longest in cool, dry conditions. The ideal storage temperature is between 32°F and 41°F. Lower temperatures dramatically extend seed life. A seed stored at room temperature may remain viable for 2-3 years; the same seed stored in a freezer can remain viable for 10-20 years or longer.
Humidity is equally important. Seeds stored in humid environments absorb moisture and deteriorate rapidly. Use airtight containers, glass jars with tight lids, plastic freezer bags sealed carefully, or dedicated seed storage boxes. Include a desiccant packet inside the container to absorb any residual moisture.
Never store seeds in paper envelopes unless you're using them within a season. Paper is permeable and allows moisture exchange with the environment.
Labeling and Record-Keeping
Label every container with the variety name, harvest date, and source. This information is invaluable. If seeds fail to germinate, you'll know whether they're simply old or if something went wrong during processing. You'll also track which varieties perform best in your garden over time.
Keep a simple record book. Note the date you saved seeds, the plant's performance that season, any diseases or pests you observed, and the germination rate when you plant them the following year. This record becomes increasingly valuable as years pass. You'll develop a clear picture of which varieties thrive in your conditions and which struggle.
Seed Viability Testing and Troubleshooting Failures
Before planting an entire season's garden from saved seeds, test germination rates.
Place 10 seeds on a damp paper towel, roll it loosely, and place it in a plastic bag. Keep the towel damp but not waterlogged.
If seeds fail to germinate, review your process. Did you harvest when seeds were fully mature? Were they dried completely?
Some seeds naturally have lower germination rates. If a particular variety consistently underperforms, adjust your expectations or harvest more seeds to compensate.
Seed saving transforms you from a consumer of seeds into a producer. It's a small shift in mindset that builds genuine self-reliance.
To accelerate your progress, consider starting with ARK Seed Kits' Seed Growing Guide, which includes detailed crop-by-crop instructions for saving seeds from every variety in our collections.

| Task | Best Time | Frequency |
|---|---|---|
| Select healthy plants | Early growing season | Once per season |
| Monitor for disease | Throughout season | Weekly |
| Harvest mature seeds | Late summer/fall | Once per season |
| Dry seeds | After harvest | 2-4 weeks |
| Test germination | Before spring planting | Once per year |
| Refresh desiccant | Every 12 months | Annually |
Frequently Asked Questions
How do beginners save heirloom seeds?
Start with easy crops like beans, peas, and lettuce. Choose the healthiest, most vigorous plants, let them fully mature on the plant, harvest the dry seed pods or allow wet seeds to ferment and dry completely. Store in a cool, dry place in labeled envelopes or airtight containers with desiccant. ARK Seed Kits' Seed Guide provides crop-specific instructions for every variety in our kits, making the process straightforward even for first-time seed savers.
Which vegetables are easiest seeds to save for beginners?
Beans, peas, lettuce, radishes, and herbs like basil and cilantro are the easiest seeds to save for beginners because they self-pollinate, produce large, easy-to-harvest seeds, and require minimal processing. Tomatoes are also beginner-friendly if you ferment the seeds properly. These crops have high germination rates and store well, making them ideal for building confidence before moving to more complex varieties.
How long do saved heirloom seeds last?
Properly stored heirloom seeds can remain viable for 3 to 5 years or longer, depending on the crop and storage conditions. Beans, peas, and root vegetables typically last 4 to 5 years. Tomatoes and peppers can last 3 to 4 years. Storing seeds in airtight containers with desiccant in a cool, dry place extends longevity significantly. ARK Seed Kits packages seeds for 15+ year storage using indestructible PVC tubing, ensuring long-term viability for emergency preparedness.
How should you dry seeds before storing them?
Spread seeds on a paper plate or cloth in a warm, dry, well-ventilated area away from direct sunlight. For dry-seed crops like beans and peas, allow 2 to 3 weeks of drying until seeds are brittle and snap when bent. For wet-seed crops like tomatoes, ferment in water for 3 to 5 days, rinse thoroughly, then dry for 2 to 3 weeks. Target a moisture content below 8% to prevent mold and ensure long-term storage success.
How can you prevent cross-pollination when saving seeds?
Plant different varieties of the same crop at least 10 to 20 feet apart, depending on the crop and pollinator activity. For example, tomatoes require 10 feet separation, while squash and cucumbers need 20 to 50 feet. Hand-pollinate flowers yourself to control which plants breed together. Use row covers to exclude pollinators during flowering. For home gardeners with limited space, focus on self-pollinating crops like beans and tomatoes, which naturally prevent cross-pollination.
How should you store seeds to keep them viable?
Store seeds in airtight containers such as glass jars, sealed envelopes, or paper packets in a cool, dry place between 35 and 50°F with humidity below 50%. Include a desiccant packet to absorb moisture. A refrigerator or freezer works well for long-term storage. Label each container with the crop name, variety, and harvest date. Keep seeds away from direct sunlight and temperature fluctuations. Proper storage prevents mold, extends germination rates, and ensures seeds remain viable for multiple growing seasons.
What is seed viability testing and why does it matter?
Seed viability testing is a germination test that determines what percentage of your saved seeds will actually sprout. Place 10 seeds on a damp paper towel, fold, and keep moist for 7 to 14 days in a warm location. Count how many germinate to calculate viability percentage. This test reveals whether your seeds are worth planting and helps you adjust planting density accordingly. Testing saved seeds before the growing season prevents wasted garden space and ensures you have reliable backup seeds for food security.
Can you save seeds from any heirloom vegetable?
You can save seeds from most heirloom vegetables, but success depends on whether the plant is open-pollinated or a hybrid. Open-pollinated heirloom varieties produce true-to-type seeds that grow identical to the parent plant. Hybrids do not breed true and will produce unpredictable offspring. Avoid saving seeds from hybrid varieties. Focus on open-pollinated heirlooms like ARK Seed Kits offers, which guarantee you can save seeds year after year and grow the same reliable varieties repeatedly.


